
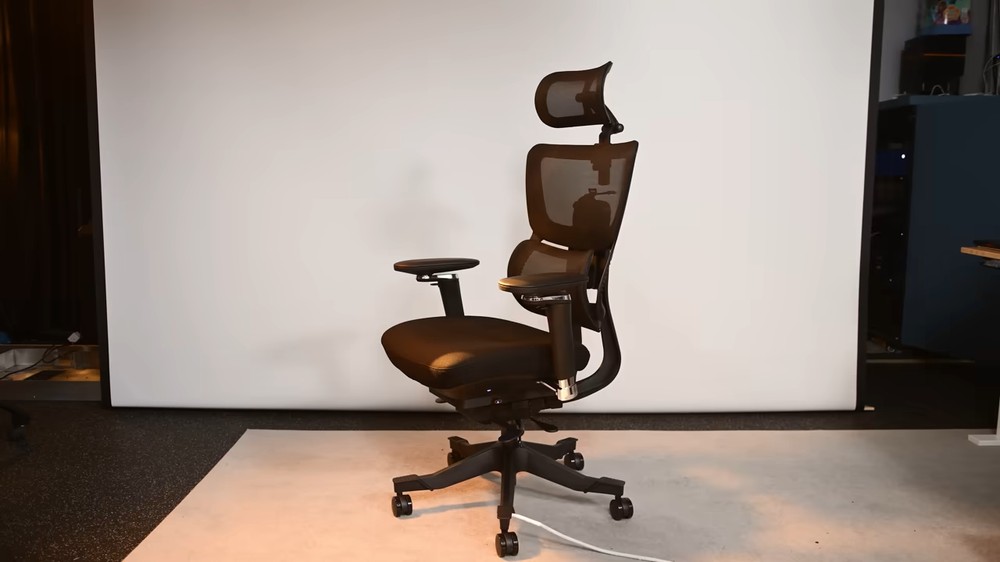
Okay, I’ve analyzed the text and images you provided. Here’s a summary of the process of integrating PC parts into a computer chair, as described in the article:
The Goal: To build a fully functional PC inside a computer chair, with only one power cord visible.
Challenges and Solutions:
Space Constraints: The biggest challenge was fitting all the PC components within the limited space of the chair while ensuring they wouldn’t be damaged when someone sat down.
Initial Idea (Behind the chair): The initial plan to hide the components behind the chair’s back was abandoned due to insufficient space and aesthetic concerns.
* Solution: Under the Seat Cushion: The final solution involved placing the components under the wooden board supporting the seat cushion.
Specific Component Choices and Placement:
- Motherboard: A miniITX motherboard was chosen for its compact size.
- Height Clearance: 50mm aluminum pillars were installed to create a gap between the wooden board and the components,preventing damage when someone sits.
- Graphics Card: A PCIe extension cord was used to lay the graphics card flat, as its standard vertical height would exceed the available space.
- Power Supply: A Flex power supply (designed for servers) was used because its 40mm height was significantly smaller than a standard power supply (63mm), allowing it to fit under the motherboard.
- Hard drive: A 3.5-inch hard drive was placed in the structural area of the external chair foot cushion.
- Covering: Custom 3D-printed covers were designed to conceal the components and maintain the chair’s original structure.
In essence, the creator had to carefully select components with specific dimensions and use creative solutions (like the PCIe extension and Flex PSU) to overcome the spatial limitations of the chair. The 3D-printed covers were the final touch to make the integration seamless and aesthetically pleasing.